


TL;DR: This article shows how to integrate Microsoft’s PowerApps and Business Central with an easy-to-follow, step-by-step process with screen captures and clear instructions.
Learning how to integrate Microsoft PowerApps with Business Central might be simpler than you imagine. Over this easy-to-follow and quick guide, we’ll show you the step-by-step process to get those integrations done. Let’s get you ready to harness its multiple advantages!
This beneficial collaboration allows organizations to create customized, user-friendly applications that facilitate better decision-making and streamlined workflows. It also enables automation, enhances efficiency, and improves data utilization within businesses.
But that’s not all. This integration can furthermore offer cost-effectiveness, scalability, and robust security while supporting cross-platform capabilities. Without further ado, let’s get right to it!
When Using Microsoft Copilot
If you want to jump on Copilot to ask for a simple integration with a Canvas App and Business Central, you’ll typically get instructions that look something like this:
Integrating a Canvas App with Dynamics 365 Business Central allows you to create powerful custom applications that leverage Business Central data. Here are the steps to achieve this integration:
- Log in to PowerApps:
- Visit the PowerApps website and log in using your credentials.
- Create a New Canvas App:
- Click on New App and select Canvas in PowerApps.
- This canvas app will serve as your custom interface for interacting with Business Central data.
- Choose Your Data Source:
- In the app, select New Connection to set up a connection to your Business Central data.
- Choose the relevant dataset or table from Business Central with which you want to work.
- Design Your App:
- Use PowerApps’ intuitive interface to design your canvas app.
- Add screens, controls, and components as needed.
- Bind these elements to the connected Business Central data.
- Customize the App:
- Customize the app’s appearance, behavior, and functionality.
- Implement required business logic or workflows.
- Add buttons, forms, galleries, and other elements to enhance user experience.
- Test and Deploy:
- Test your canvas app thoroughly to ensure it retrieves and displays Business Central data correctly.
- Once satisfied, publish the app to make it accessible to users.
Copilot
But we won’t leave you to that alone. For this demonstration, we created a Dynamics 365 Customer Engagement and added a Business Central trial to that environment. You can choose any other way to do it.
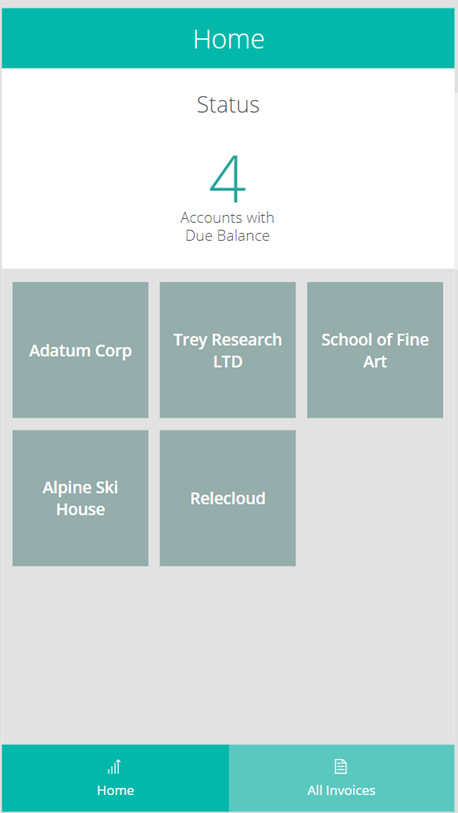
So, we start by creating a Canvas App. For this case, we are using an “Invoice Collection” app to allow sellers to collect due invoices.
First, you need a BC instance in your tenant. We personally love using CDX environments because all products are then in place on a simple setup.
To Connect Microsoft PowerApps with Business Central
So, let’s move over to connecting to BC now.
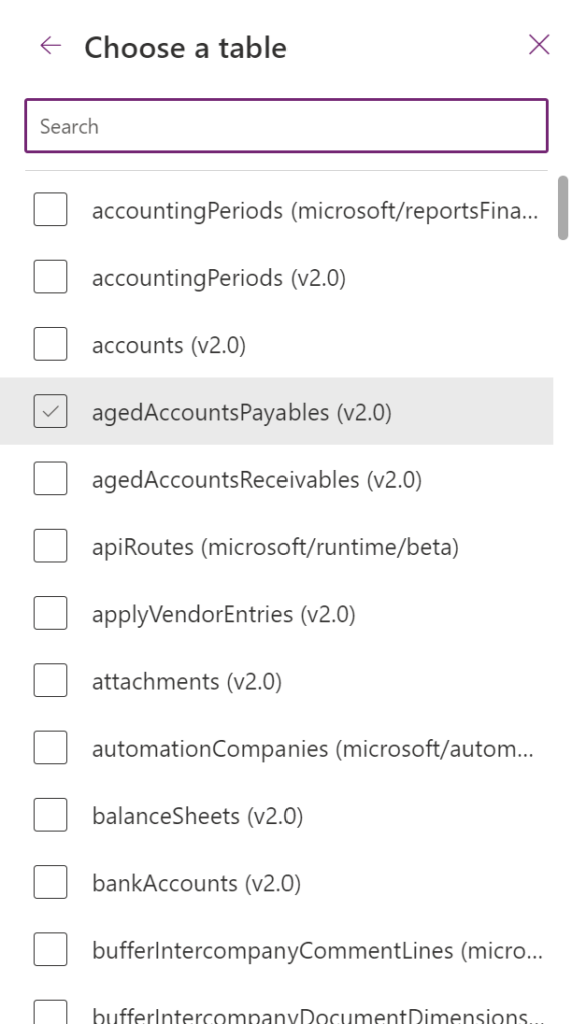
For that, we can use Dynamics 365 Business Central connector. This is a Premium feature, which explains why you see a diamond icon next to its menu option.

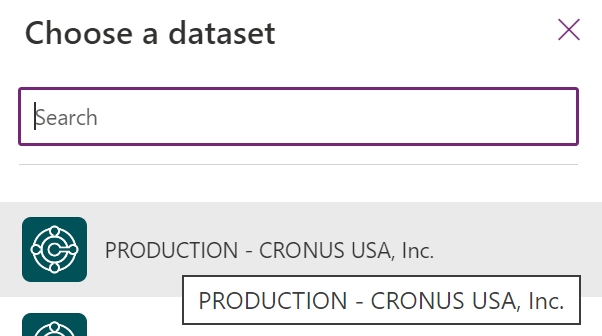
Once you connect it, doing so will display a list of pre-existing entities. Those are already available to consume. The list is extensive, by the way. The image below is just a screen capture.
We’re now ready to consume data in our app.
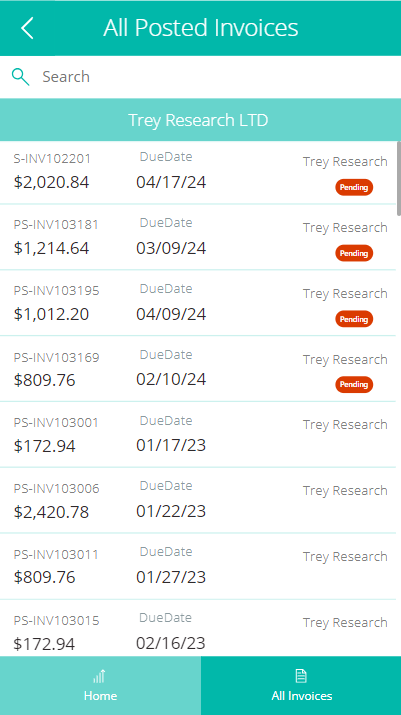
Boom! We got it.
Now, anyone can say: “I can’t find the BC table nor the field!” Several options exist to fix that. BC API’s are built using standard Rest web services, which allows you to expose additional services by extending them.
In the simplest scenario, exposing an existing BC table should be done through Pages or Queries that allow extensions. Think of Pages as a form with the fields that you see in BC. It allows CRUD operations and a read-only query is built into it.
Here’s a link to Microsoft Lean’s complete API reference, too.
Open Visual Studio Code and add at least the following two extensions:

Then, go to command palette and run command AL Go!

The system will ask for a folder.

It will also ask for the BC version.

Now, the system will try to connect to an instance to download the symbols (system objects). You may see this link connect to BC, but, before that, it’ll ask for the type of environment. *You cannot select a Production environment.*

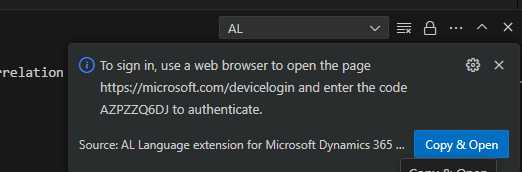

Right click and paste the code you will already have copied. (If you noticed, Visual Studio Code shows Copy & Open.) You’ll have the code required to enter in this window. After this step, you’ll be asked for username and password credentials. If you complete the instructions, you’re almost there.
If you miss that pop up, don’t worry. Run “AL: Download symbols”

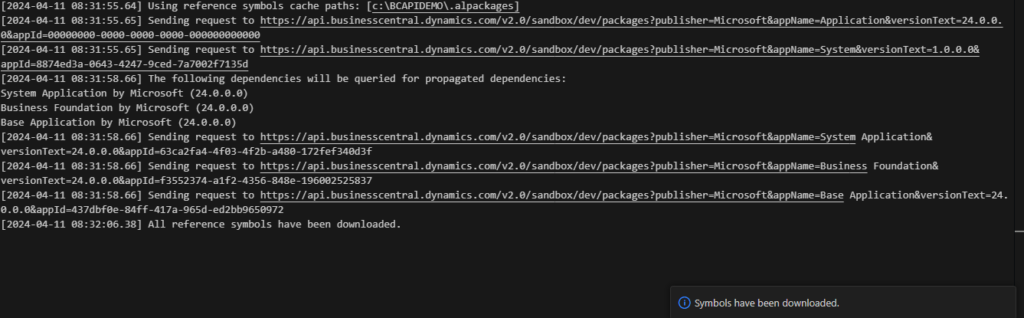
The system will download symbols.
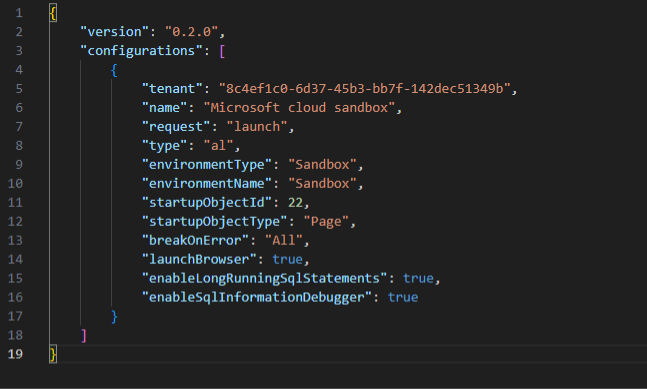
Look for the launch.json file in the VS Code project. Amongst other things, this file indicates the environment type, environment name and BC tenant to be used.
If the tenant field does not exist, just add it. Here’s information on how to find the tenant ID.

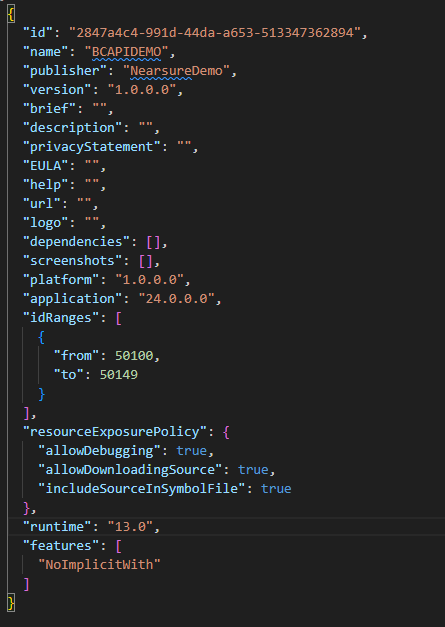
Take a look at app.json. We’ll need to code a simple API that will bring three fields from an existing table.
Important Notes to Consider
It’s important to consider the publisher here. The publisher is the company working on the solution. There are several related fields to consider, but one of the most important ones is the idRange. That one indicates the range of the extensions you’ll use. BC works with these numbers to identify the different types of extensions. For example, there are ranges for internal development (MS), others for ISVs, and another one for common extensions. You can always read more about them, too.
The above means that the page we’re going to create must be defined within that range. You’ll notice that 50103 is in the declared range.
/// <summary>
/// Page API Nearsure (ID 50103).
/// </summary>
page 50103 "API Nearsure"
{
    APIGroup = 'NearsureAPI';
    APIPublisher = 'Nearsure';
    APIVersion = 'v1.0';
    ApplicationArea = All;
    Caption = 'VendorAPI';
    DelayedInsert = true;
    EntityName = 'vendor';
    EntitySetName = 'vendors';
    PageType = API;
    SourceTable = Vendor;
    ChangeTrackingAllowed = true;
    ODataKeyFields = SystemId;
    Extensible = false;
    layout
    {
        area(content)
        {
            repeater(General)
            {
                field(id; Rec.SystemId)
                {
                    Caption = 'Id';
                    Editable = false;
                }
                field(no; Rec."No.")
                {
                    Caption = 'No.';
                }
                field(name; Rec.Name)
                {
                    Caption = 'Name';
                }
            }
        }
    }
}
Now, let's go over the top part of the code, we added a few comments to each part.

Since we’re thinking of using the API to CRUD operations, we added a couple more items to consider, but we won’t cover those in this article. Just keep in mind you can add items such as data validation, formatting, triggering events, and more.
Checking if the Code Works
You can check if the code works by building the code using Ctrl-B. Doing so will generate a .app extension.
Once it’s ready, we’ll proceed to publish. From the command palette of Visual Studio code, we can AL:Publish without Debugging (Ctrl-F5) or using the default Publish with debugging option (F5).

Your extension will be available for use in any company under the same environment.
Now, we also added another screen to the app we created and connected it to the data source in our Canvas App. We can thus see the new API and can proceed to consume it.

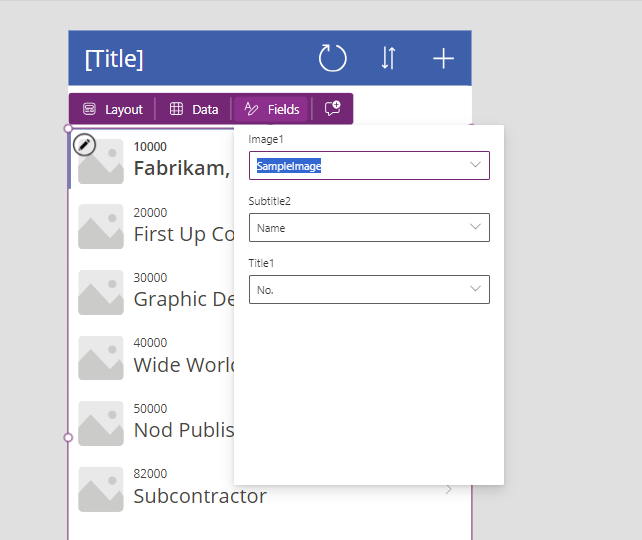
Voilá! You just created the first extension to bring information from BC.
To Wrap This Up on Microsoft PowerApps Integrations to BC
You can use the built-in API calls that come OOB to communicate with BC from your application. Alternatively, you can create your own custom API pages to interact with any table on the system. Either way, the user needs to have the corresponding permissions.
Need help implementing integrations? Reach out to us. We’re ready to offer expert technological solutions to tackle your business challenges head-on.


